Pages

Wednesday, 5 March 2014

Peanut Butter

a vegan spread

For the 80% raw, 20% cooked food vegan that I am, this, my dear friends, is the epitome of comfort cooked food.  This tops the list!  I eat so much of it so I had to learn to make it myself--if not for economic reasons, then for convenience and sheer awesomeness!  Any why not?  It's simple and you can be absolutely sure there aren't any nasty and harmful substances in it.

I had a conversation with my Dutch friend, Dominik, a few days ago about how I make my own peanut butter.  He asked if I had posted a recipe on my food blog but then I hadn't at the time so I just gave him the instructions.  This posting is for the sake of pictures and for the benefit of the rest of the world.

Hey, Dominik, enjoy making your own peanut butter from now on!

peanut butter
Presenting: My home made peanut butter... and my Chinese visa papers? Hahaha!
I made just a small batch for photographic purposes since I still have a half-full jar in my fridge good for the rest of the week.  This recipe, though, will be good for about a 150-millilitre mason jar.

You will need:
- 2 cups of raw peanuts (off the shells, of course, but skin on or off doesn't matter to me) 
- 2 tablespoons of peanut oil or coconut oil (I use virgin coconut oil.) 
- 1 tablespoon (more or less or none) of agave nectar/maple syrup/honey/sugar 
- ½ teaspoon of salt

To make peanut butter:
1.  You may begin by dry roasting the peanuts or frying them in the coconut oil.  Up to you.  This takes about 5 minutes over low heat, with constant stirring to ensure even cooking. 
2.  Drop everything in a food processor along with all your other ingredients and blend for about 2 minutes or until you achieve the desired consistency.  (Because I only made a tiny batch, I used a coffee grinder instead of a food processor.  It works, too.)

NOTE:  To make chunky peanut butter, reserve a tablespoon of peanuts before blending and add them in afterwards, blending for only 20 seconds to make sure you get chunks.

ANOTHER NOTE:  After making your base peanut butter (i.e. the recipe above), you can take it to the next level by adding cocoa powder or cinnamon or vanilla.  You can even apply this recipe using other nuts like cashew and almond to make other types of nut butter.

Home made peanut butter
Peanuts frying - skin on

peanut butter
blending in a coffee grinder

peanut butter
Voila!  It's fluid at this point because it's hot but it'll turn viscous when it cools.
Those are green tomatoes from my mother's farm in the background.

Monday, 6 January 2014

Mixed Vegetables Soup

a vegan soup

This is my way of educating people on the basics of soup making.  Anyone can make soup but the question of taste is always a concern.  In this recipe, I will explain the rudiments of how to adjust ingredients and what the basics are to making it work.

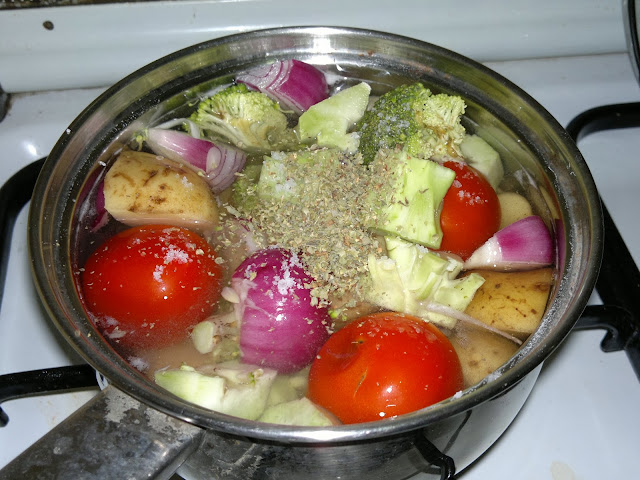
vegan soup
right before cooking

This particular recipe will give you a bowl good for 2 people (eating only this dish as a full meal) but you can adjust it proportionately so you can make more.

There are various kinds of soup and a wide variety of ingredients you can use.  For this one, I used:
- 2 standard-sized potatoes 
- 3 medium tomatoes 
- 1 cup of chopped broccoli head 
- 1 cup of chopped broccoli stalk (without the hard outer layer) 
- 2 whole onions, roughly cut 
- 2 cloves of garlic, crushed 
- 1 teaspoon of dried marjoram (oregano) leaves 
- water 
- salt and black pepper for seasoning (after cooking)

Tools necessary are a sauce pan and a food processor or blender.

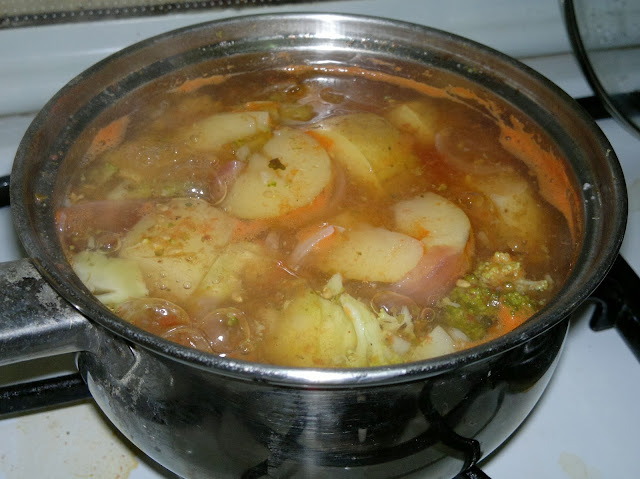
The process is very simple:  Put all ingredients in a sauce pan; add a couple of pinches of salt; cover with about 3 to 4 cups of water (depending on how viscous or fluid you want it); bring to a boil and simmer for 15 minutes.  After simmering, transfer to a food processor or blender and pulse to liquefy.  Season with salt and pepper to taste and then serve.

simmering vegan soup
simmering

vegan soup
served with a garnish of cooked chopped broccoli head

Depending on the available ingredients and your taste buds' preference, you can adjust what the soup contains.  For example:  You can use just one onion or half.  You can use only one or two tomatoes, or five if it pleases you.  You can omit the marjoram or use thyme.  Better yet, add coriander and parsley.  You can omit the broccoli and use pumpkin instead.  The possibilities are endless.  Just don't go crazy.

If something isn't desirable eaten in a salty scenario, don't use it—or if you have to use it, don't use too much.  Take carrots, for instance.  It's a good vegetable but I think it makes soup cloying if you use a lot.  Don't use too much of ingredients that are strong unless they have a necessary appeal like tomatoes.  They are lovely and most of us wouldn't mind a lot of them in soup.  Heck, you can even make them your primary ingredient.  Onions, as well, are great—as in French onion soup.  More than three cloves of garlic, however, in a bowl of soup that serves two people, is not very palatable.

Your choice of herbs will affect the taste, too.  Coriander, marjoram, thyme and parsley are great for soups.  You can add lots of parsley and coriander but not really thyme and marjoram.  They're very imposing.  So are other herbs like tarragon, basil, mint, rosemary and sage.  While they are acceptable in small quantities, they might give you the feeling that you're drinking an infusion rather than eating soup if you use too much.

Experimentation is necessary in the art of soup making.  You'll find that the more mistakes you make, the more you get better.  Mistakes are how I came up with these guidelines.  Make soup making a habit and you'll get the hang of it as the days come by.

Sunday, 5 January 2014

Hummus

a vegan sauce

To be completely honest, although I do consume a fair amount of Tahini, I'm not a huge fan of it on its own.  The real reason I make it is so I could then proceed to making hummus—an awesome Middle Eastern food item that requires it.

Hummus is actually the Arabic term for chickpeas.  What we're dealing with here is called ḥummuṣ bi ṭaḥīna in Arabic—meaning hummus with tahini.  It is the non-sweet cousin of peanut butter that is commonly consumed in the region where Jesus Christ and Mohammed lived.  Whether or not you adhere to an Abrahamic religion, you'll probably love this.


Following this recipe will fill up a standard peanut butter jar or, in my case, again, a plastic container.

You will need:
- 2 cups of cooked chickpeas (or garbanzo beans, as they are otherwise called) 
- 2 tablespoons of tahini 
- 1 clove or garlic (or 2, depending on the kick you want in it) 
- ½ cup of the stock from cooking the chickpeas 
- 4 tablespoons of lemon juice (or lime juice) 
- 1 teaspoon of salt (or ½, depending on the strength of your salt) 
- 2 tablespoons of olive oil

To make it, just blend all the ingredients in a food processor until you come up with a smooth paste.

Serve with a light sprinkle of ground black pepper and paprika and a good drizzle of olive oil.

Tahini

a vegan sauce

I've been playing with Middle Eastern vegan food over the last couple of days and, really, one can't function well in such a field without Tahini.  It's actually Tahina, if you're gonna be strict about its Arabic pronunciation, by the way.


Following this recipe will fill up a small jar or, in my case, plastic container.

You will need:
- 2 cups of sesame seeds 
- 5 tablespoons of vegetable oil (preferably extra virgin olive oil because it is cold pressed and raw) 
- water if necessary

There are two ways to go about this:  Raw or roasted.  I personally prefer raw because I think it's healthier but roasting is traditional so I'm not adverse to it.  There are two attitudes you receive this food item with—you either like it or you don't—and raw or roasted won't make much of a difference.  Either way, you'll be needing a good food processor or high speed blender (Vitamix or Blendtec are the best brands).


Let's make Tahini:
1.  (For raw)  Soak your sesame seeds in water overnight.  This is done so the seeds become easier to digest in their raw state.  Drain afterwards. 
or 
1.  (For traditional)  Roast your dry sesame seeds in a pan, just long enough for oil to start coming out of them.  Toss or stir the seeds continuously to make sure they are evenly heated.  Make sure they do not turn brown.  They may turn yellow—even goldish—but never darker than that.  Dark seeds will give you a very bitter tahini and, properly made, this food item is already slightly bitter to begin with. 
2.  Blend or process the seeds with the oil until it turns into a smooth paste.  Add a bit of water—a tablespoon at a time—if you find it difficult to blend.  Don't add too much, though, as you don't want it to become too fluid.  You want considerable viscosity in your final product.


Note:  The extra water is not necessary if your blender or food processor is powerful enough or if you have the patience to smoosh it down every five seconds.  You may even forgo the oil if you feel you don't need it.  The sesame seeds are rich in oil so all that the extra oil really does is help with the fluidity but it's not absolutely necessary.